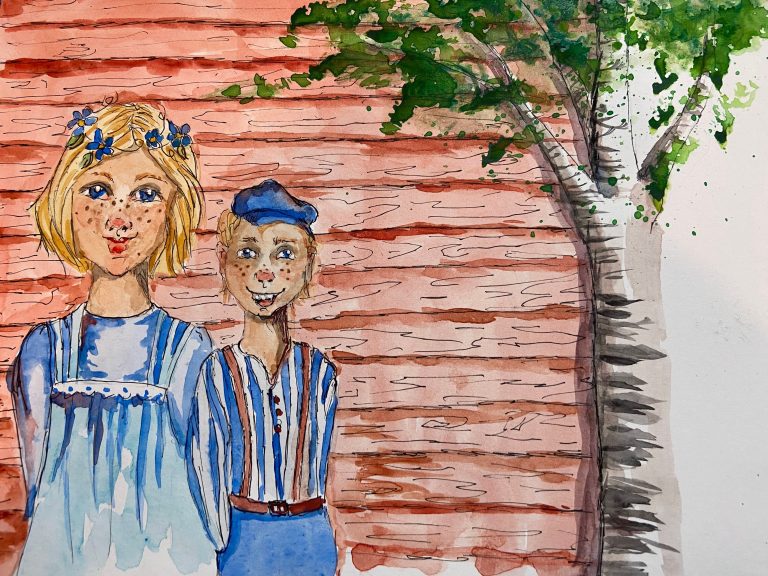
In My Studio This Week – “Dirty Palette” Watercolor Portrait
This week, I’m bringing you into my studio to see how I used leftover watercolor paint to create the final (?) self-portrait in this series. I am using a dirty palette technique where I am only using the colors that were left on my palettes from previous paintings.
I’ve been trying to use up this paint so I can start fresh, but true to my values, I hate to waste paint!
Gather Your Materials
I used a piece of pre-cut watercolor from Strathmore. It is 140 lbs./300gsm – pretty standard for watercolor paper. You might be able to use as light as 90 lb. paper or even heavy mixed media paper. I also used the graphite transfer paper to transfer the image. Paints were whatever was left on three different palettes I used in the past. If you don’t have leftover paint, use what you have focusing on colors in the red, yellow, and blue families to mix skin tones just as we did with acrylic paint. Note that two of the palettes are actually ceramic plates purchased from a thrift store, an excellent and cheap palette.
Transfer Your Image

Use tape to adhere the top side of your photograph to the background. I used painter’s tape as it is easy to remove without damaging the underlying paper.
Place the graphite or carbon paper under the image. If you applied pencil graphite to the entire backside of the photograph, skip this step.
Using a sharp pencil or pen, trace the outlines and key elements of the photograph. You will want to lift the papers and check underneath to see if the image is transferring properly. I started out with a colored pencil, but it didn’t provide enough pressure to adequately transfer, so I switched to a regular ballpoint pen. Use something that you can see the color to know that you’ve traced everything.
I was hoping to be able to lightly erase the outline, but it wouldn’t budge with a kneaded eraser and I didn’t want to tear the paper.
Paint the Background
I wetted the surface of the paper first, carefully avoiding the portrait area. I “dropped” colors of blues, reds, and magentas into the wet watercolor paper by loading my wet brush with the desired color and touching it to the wet paper. This is called the “Wet on Wet” technique and can result in beautiful effects. It can also result in a big muddy mess! I used a tissue to blot and achieve a hazy background.

Paint the Hair
I let the background dry before coming back. You can use a heat gun or hair dryer to speed up the process. I noticed the background color had bled into the hair, so I decided to paint the hair with one of the background colors. I also added the fuchsia color to the lips and leftover turquoise for the pupils.

Paint the Skin Tones
Paint the shadow areas, along the neckline, nose, and eyes. Let this dry before proceeding. Add the lighter skin tones, remembering to keep the highlights white. Continue to layer the skin tones to deepen the color where needed. I used a burnt umber color to outline the wrinkles (no!), the eyes, and color the pupils.

Add Detail
I outlined the eyes using the burnt umber and added a touch of cobalt blue to the eyes. I added a deeper red slightly to the lip area. I softened the wrinkles using a magic eraser – it really works to lift color from the paper! I added a few more darks to the hair and decided to call this one done!

Conclusion
I hope you have enjoyed this series of self-portrait tutorials and hope you feel confident to try it on your own. I may attempt to do one using paper collage – tell me if you’re interested in seeing that process.
If you would like some free coloring/journal pages, sign up below.