In My Studio This Week – How to Create a Bold Mixed-Media Portrait
This week I’m inviting you into my studio for a follow-up from my last post. This time I’m going to show you how to create a bold mixed media portrait. This version will use the self-portrait created last week to further explore color theory.
1. Gather your materials
Use the same portrait you created last week, or you can start fresh following the steps in my previous blog post below:
2. Color Choices
This process is created using acrylic paints. For this version, pick bold colors from the palettes related to blue, yellow, and red. You will need white and possibly black. For this exercise, I chose a violet, fuchsia, and just your cadmium yellow light since I didn’t have any other version.

3. Mixing the Paint
Place equal amounts of your red choice (fuchsia in this case), blue (purple), and yellow, white, and black (if needed) on your mixing surface. I mixed some of the fuchsia, purple, and yellow together and the result was a reddish brown like a sienna color (see the color on the palette knife).

4. Start Painting
WARNING! This process gets ugly before it gets betterr!
Start With the Shadows
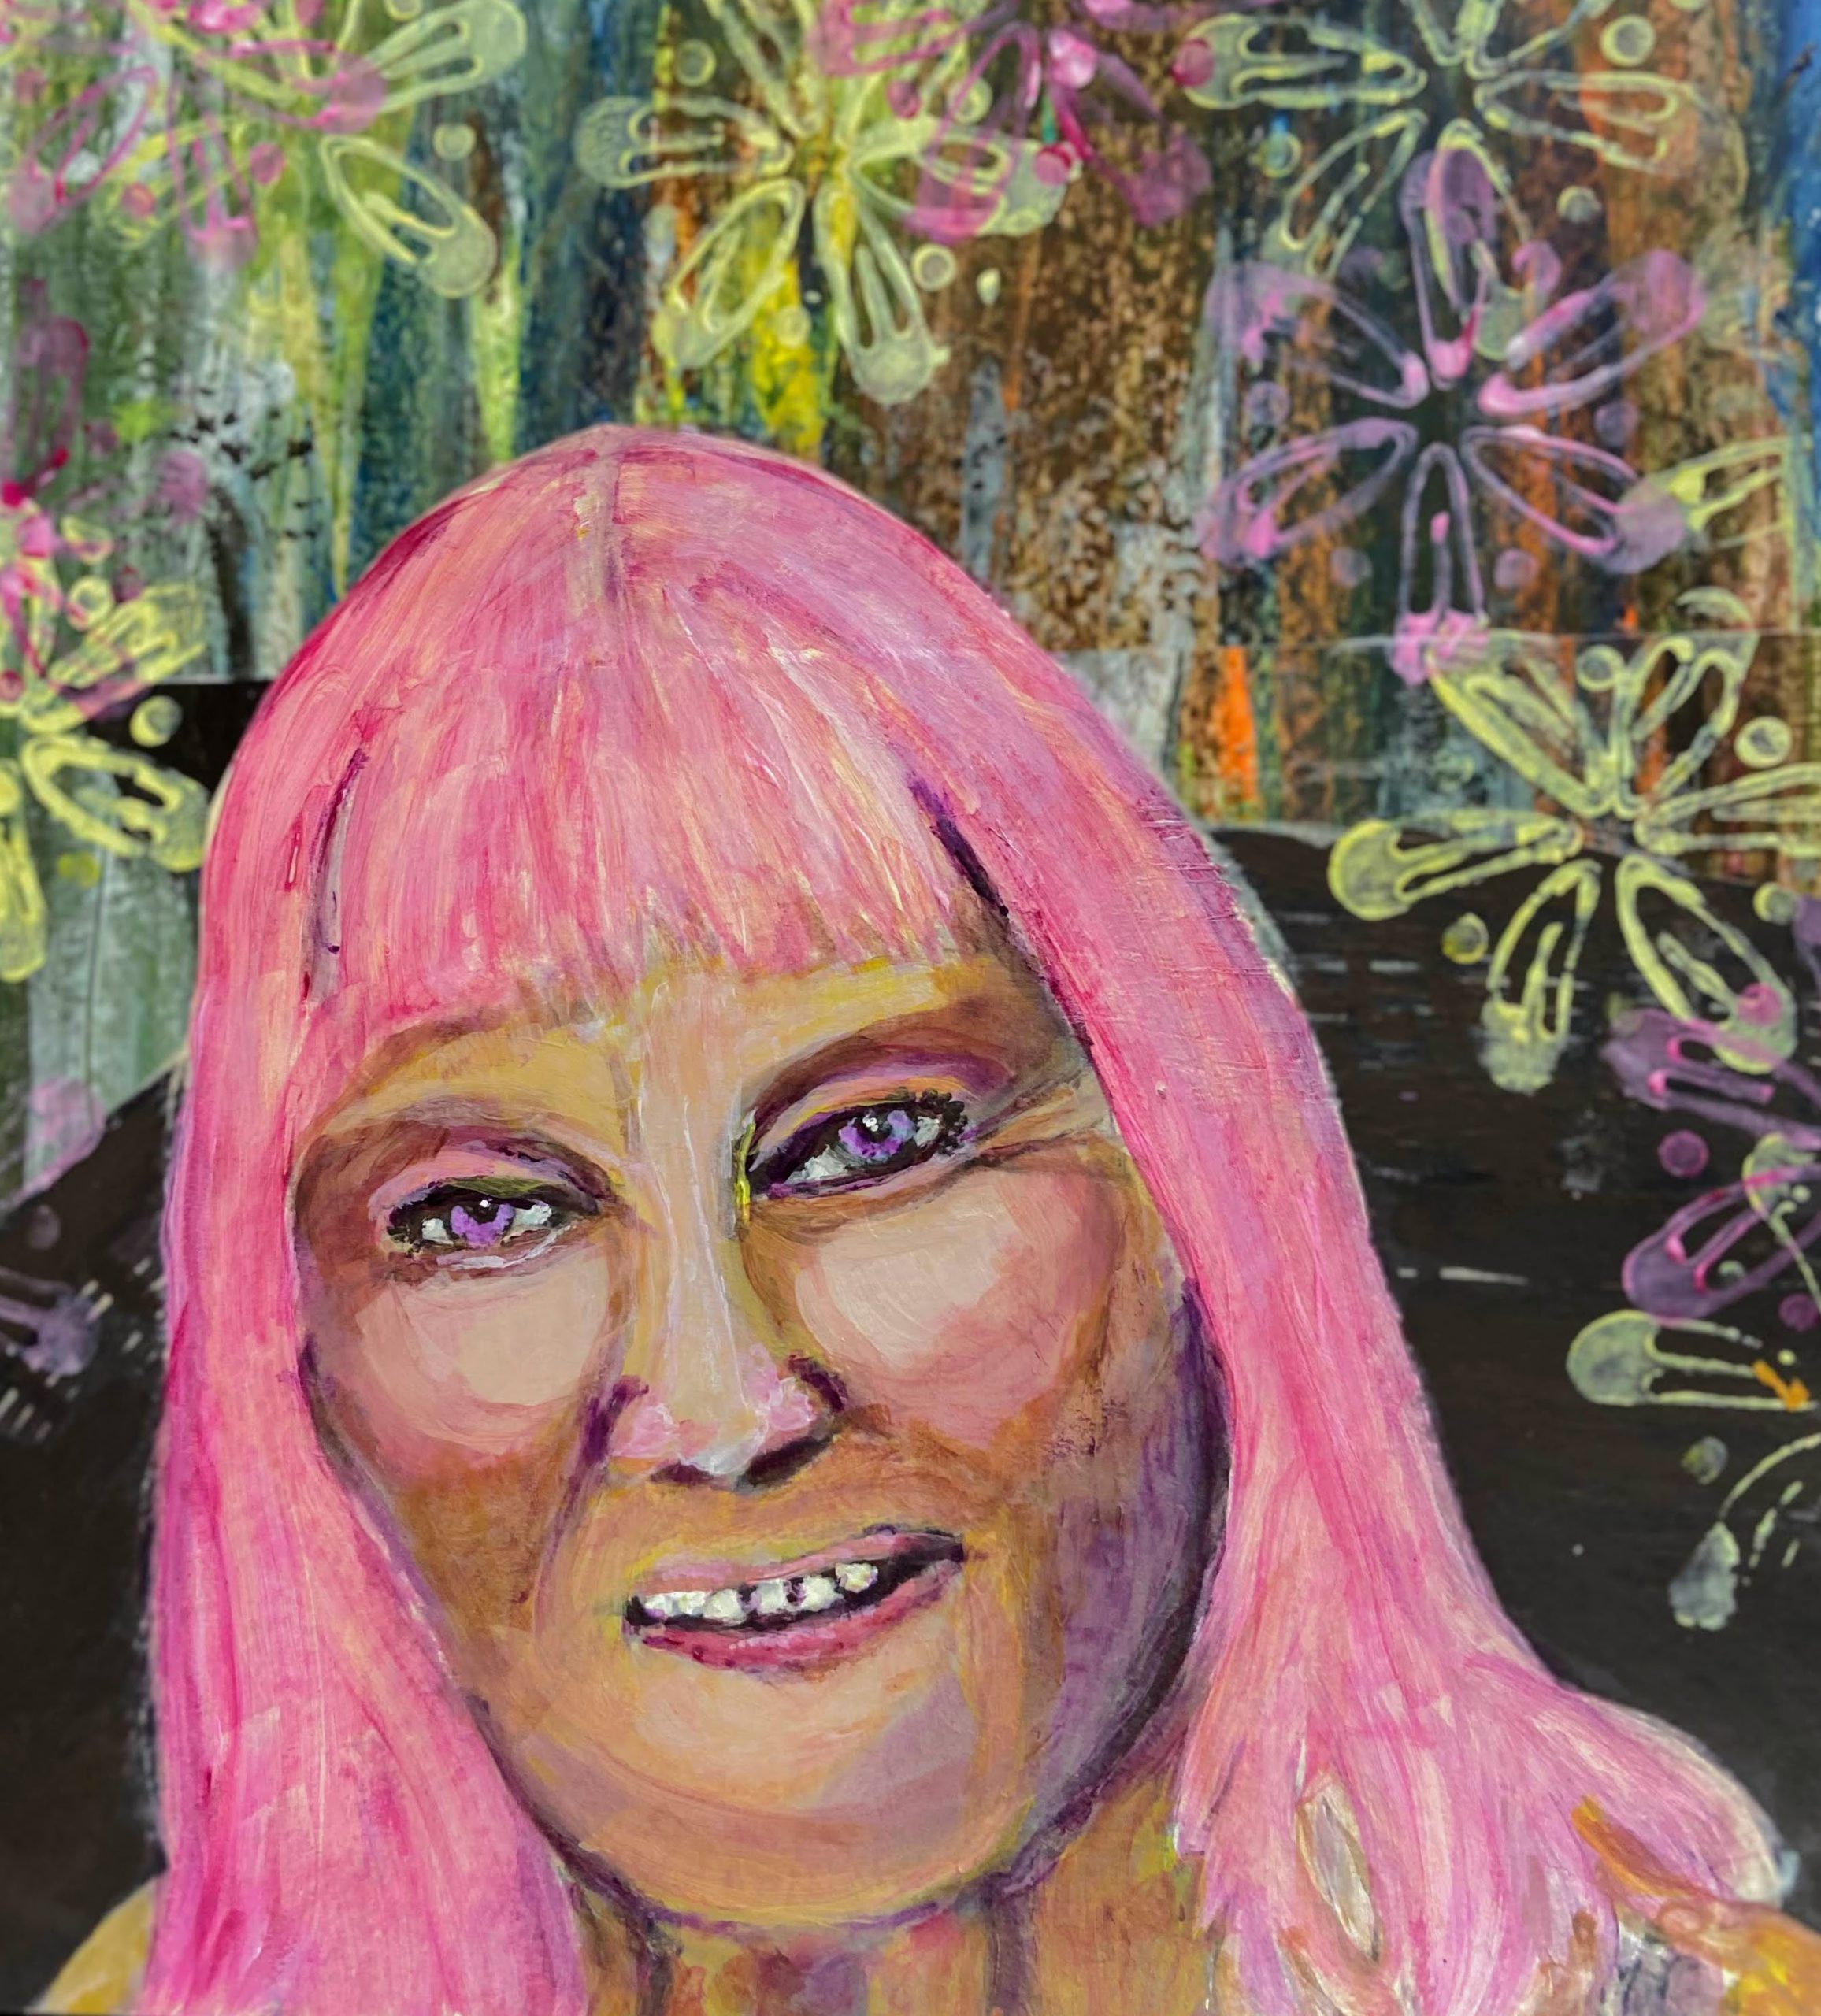
I used the deep violet to shade the areas around the jawline, hairline, neck, eyes, and nose. I watered it down to get a lighter shade for the sides of the face under the cheekbones and the chin area.

Yellow for Accent
I used the bright yellow to accentuate the brow, under the nose, and the lighter areas of the neck.

Fucshia Brings Life
The fuchsia brings the cheeks, eyelids, and nose to life.

Sienna Mix for Deepening the Shadow Areas
I used the mix of all three colors to further accentuate the shadows beneath the cheeks.

Pink Hair!
The hair is fuchsia mixed with white!

Refining the Features and Highlights
White was used to tone down the original sienna color and applied to the cheeks, chin area, neck, nose, and up into the brow. I mixed the deep violet with white for the eyes!

Final Adjustments
I used a stamp and some of the leftover paint to add flowers to the background.

What’s Next
What did I do with the leftover paint? I created another background for the next portrait in this series.

Follow me by signing up below for a free gift.
