In the Studio This Week – Harsh Reality!
In the studio this week I was faced with harsh reality – doing a self-portrait! Although I’ve done several portraits in the past, including some whimsical ones of me, I had never really done any that were focused on painting me exactly as I look – no makeup or “airbrushing” the flaws.
Facial Features
The first lesson in this section of The Mastery Program was to concentrate on drawing our facial features using a mirror while drawing. I worked on my eye, nose, and mouth trying to get as accurate as possible.
The eyes and nose were first, and I tried to focus on the shapes and not on the fact that it was my own features. I never noticed before how lopsided my nose appears.
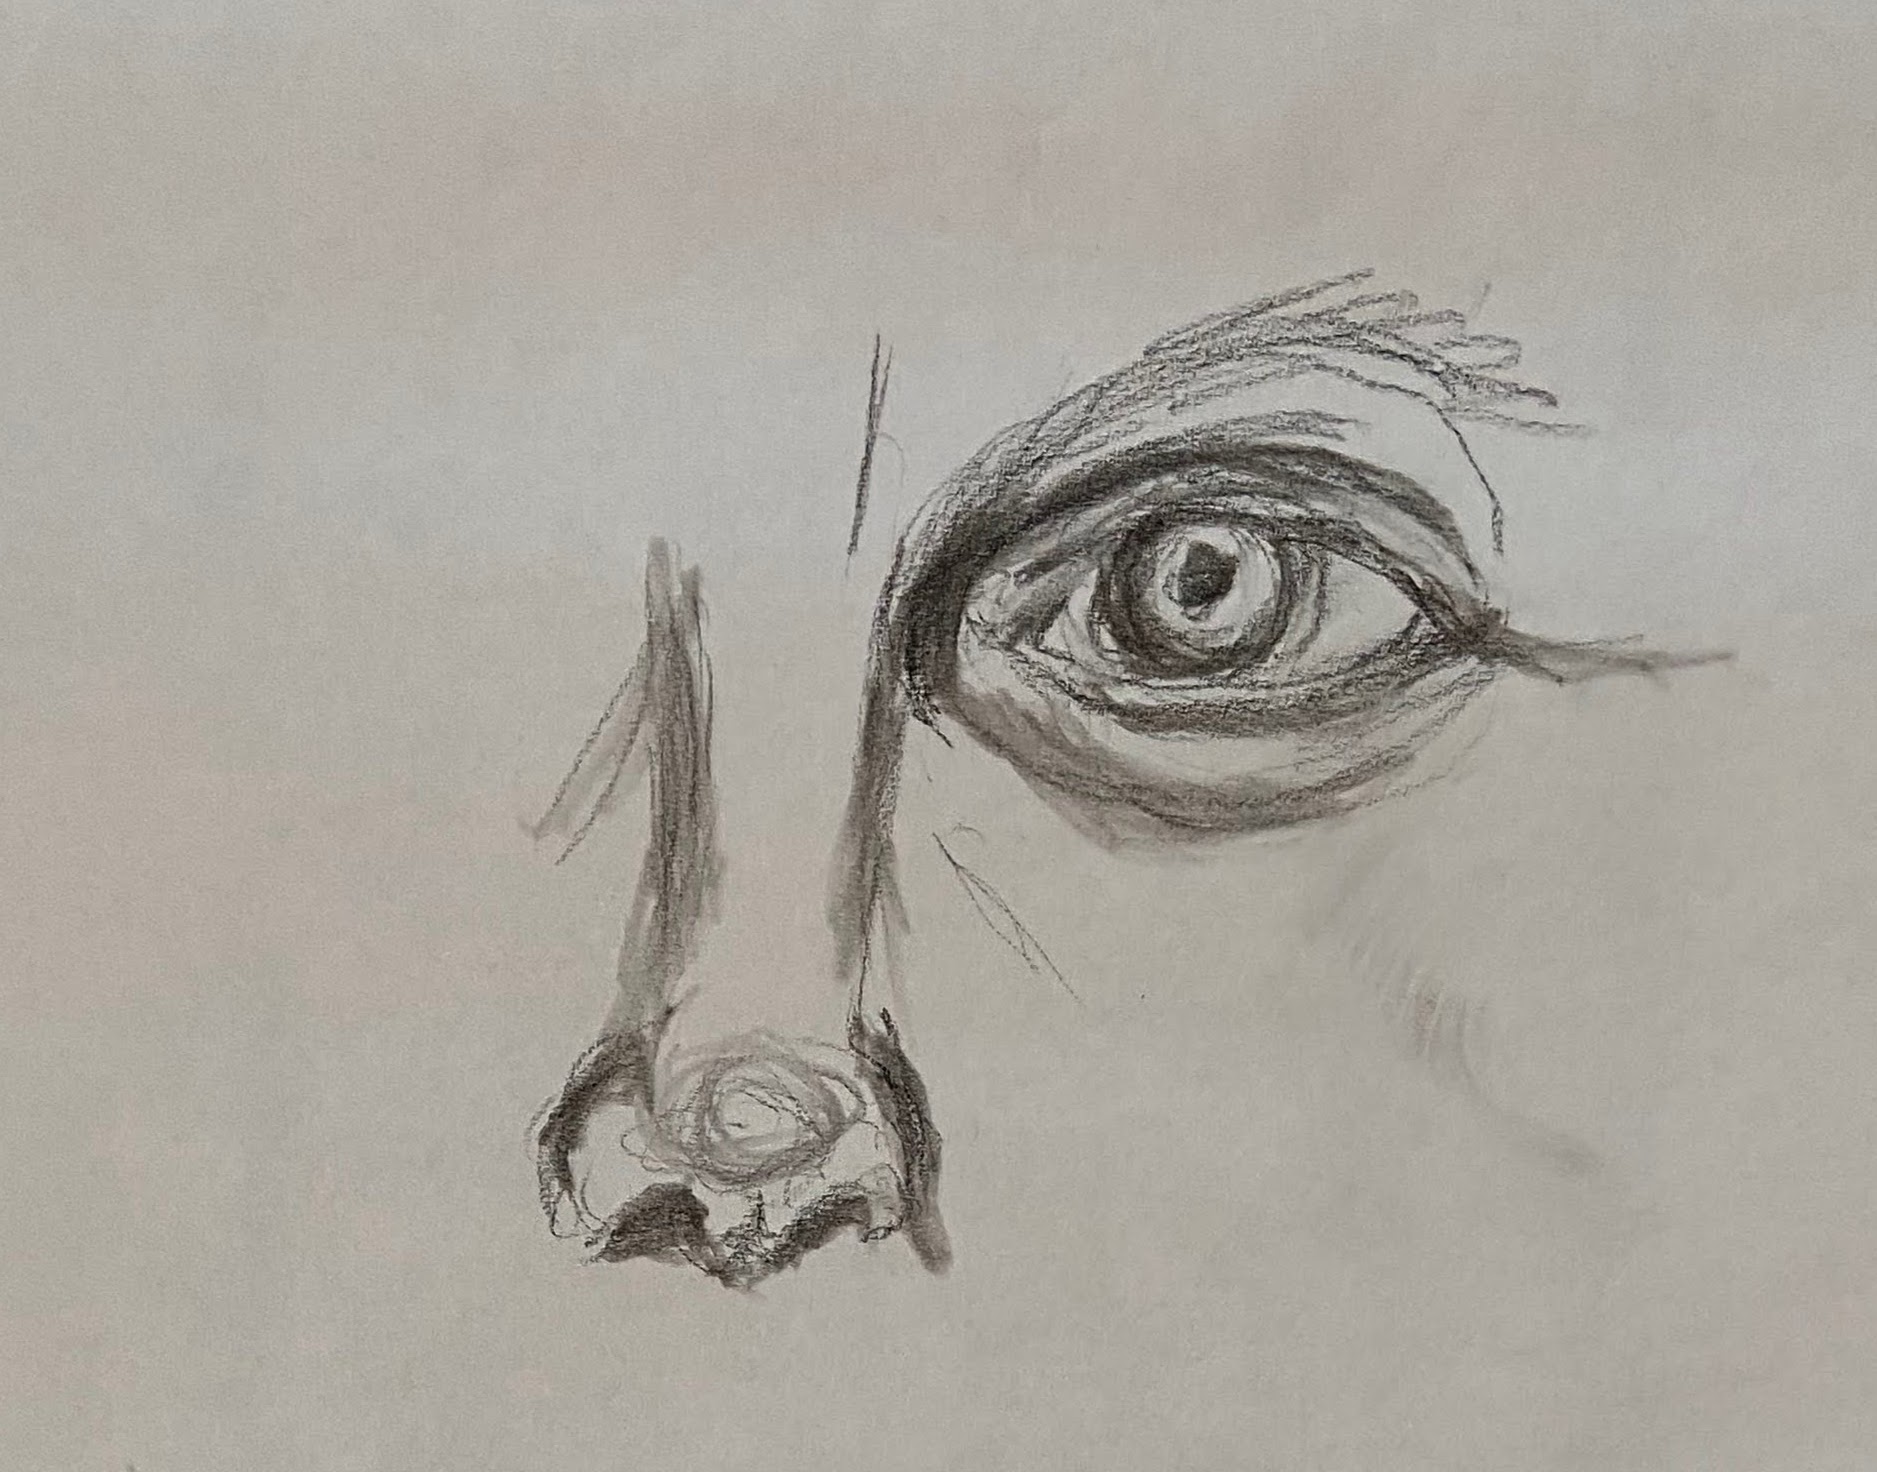
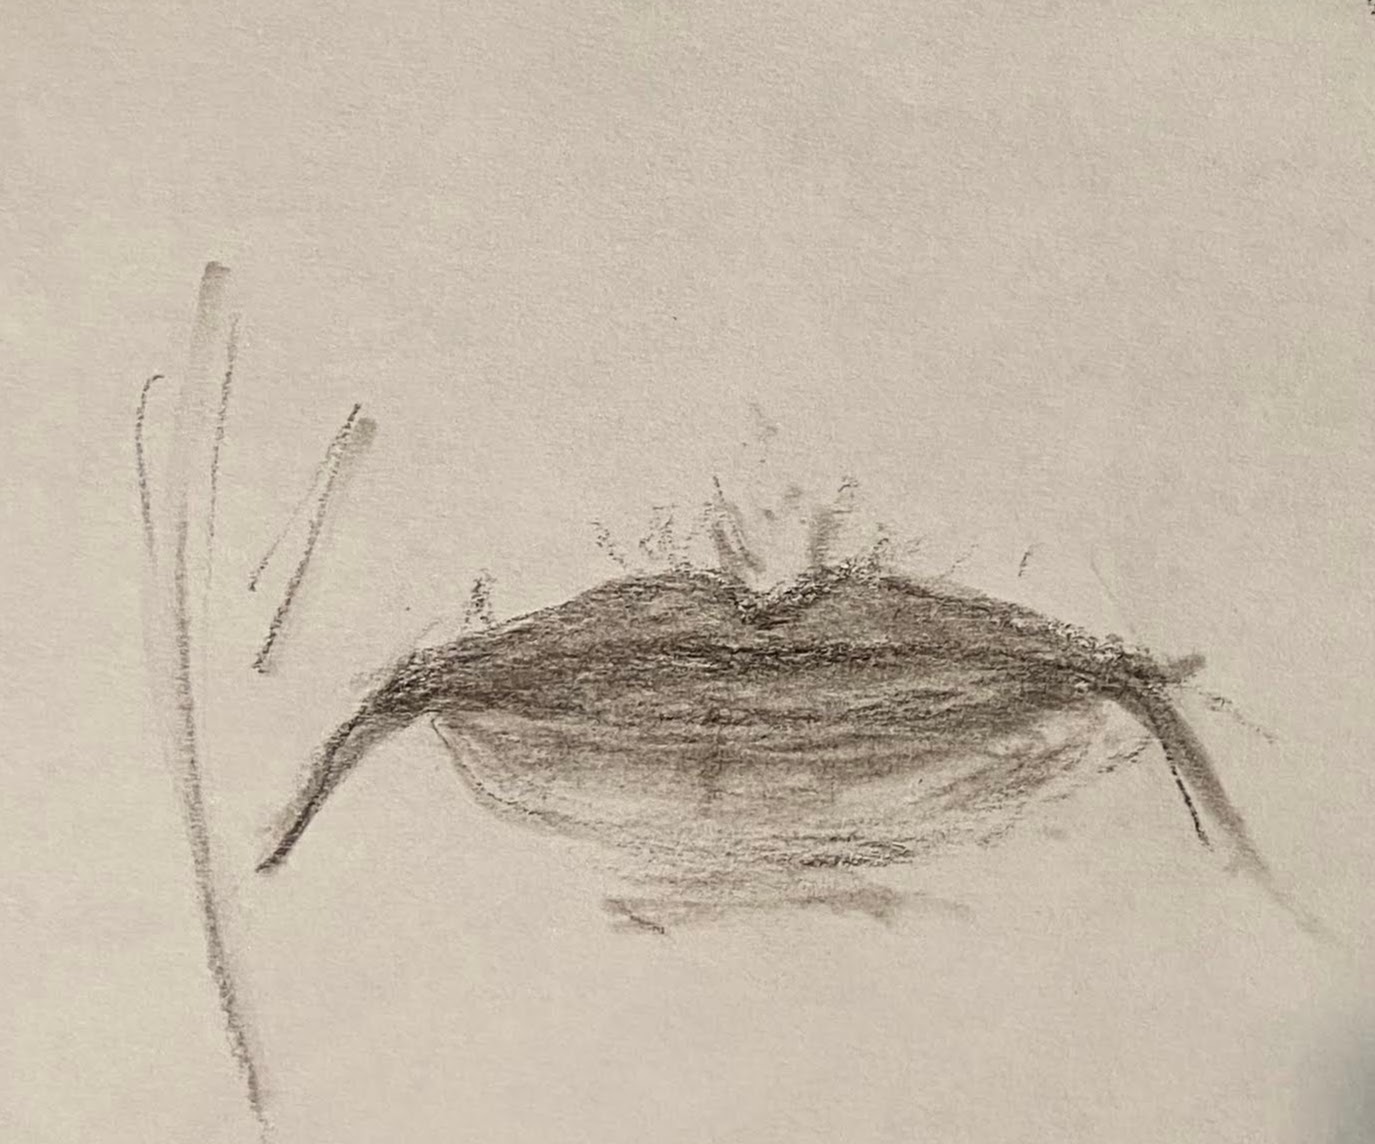
I always knew I had thin lips but just didn’t realize just how then they are. I also noted that my lower lip is actually thicker than it appears as the pigment stops before the lip ends. Not to mention the deep furrows at the corner of my lips and wrinkles above.
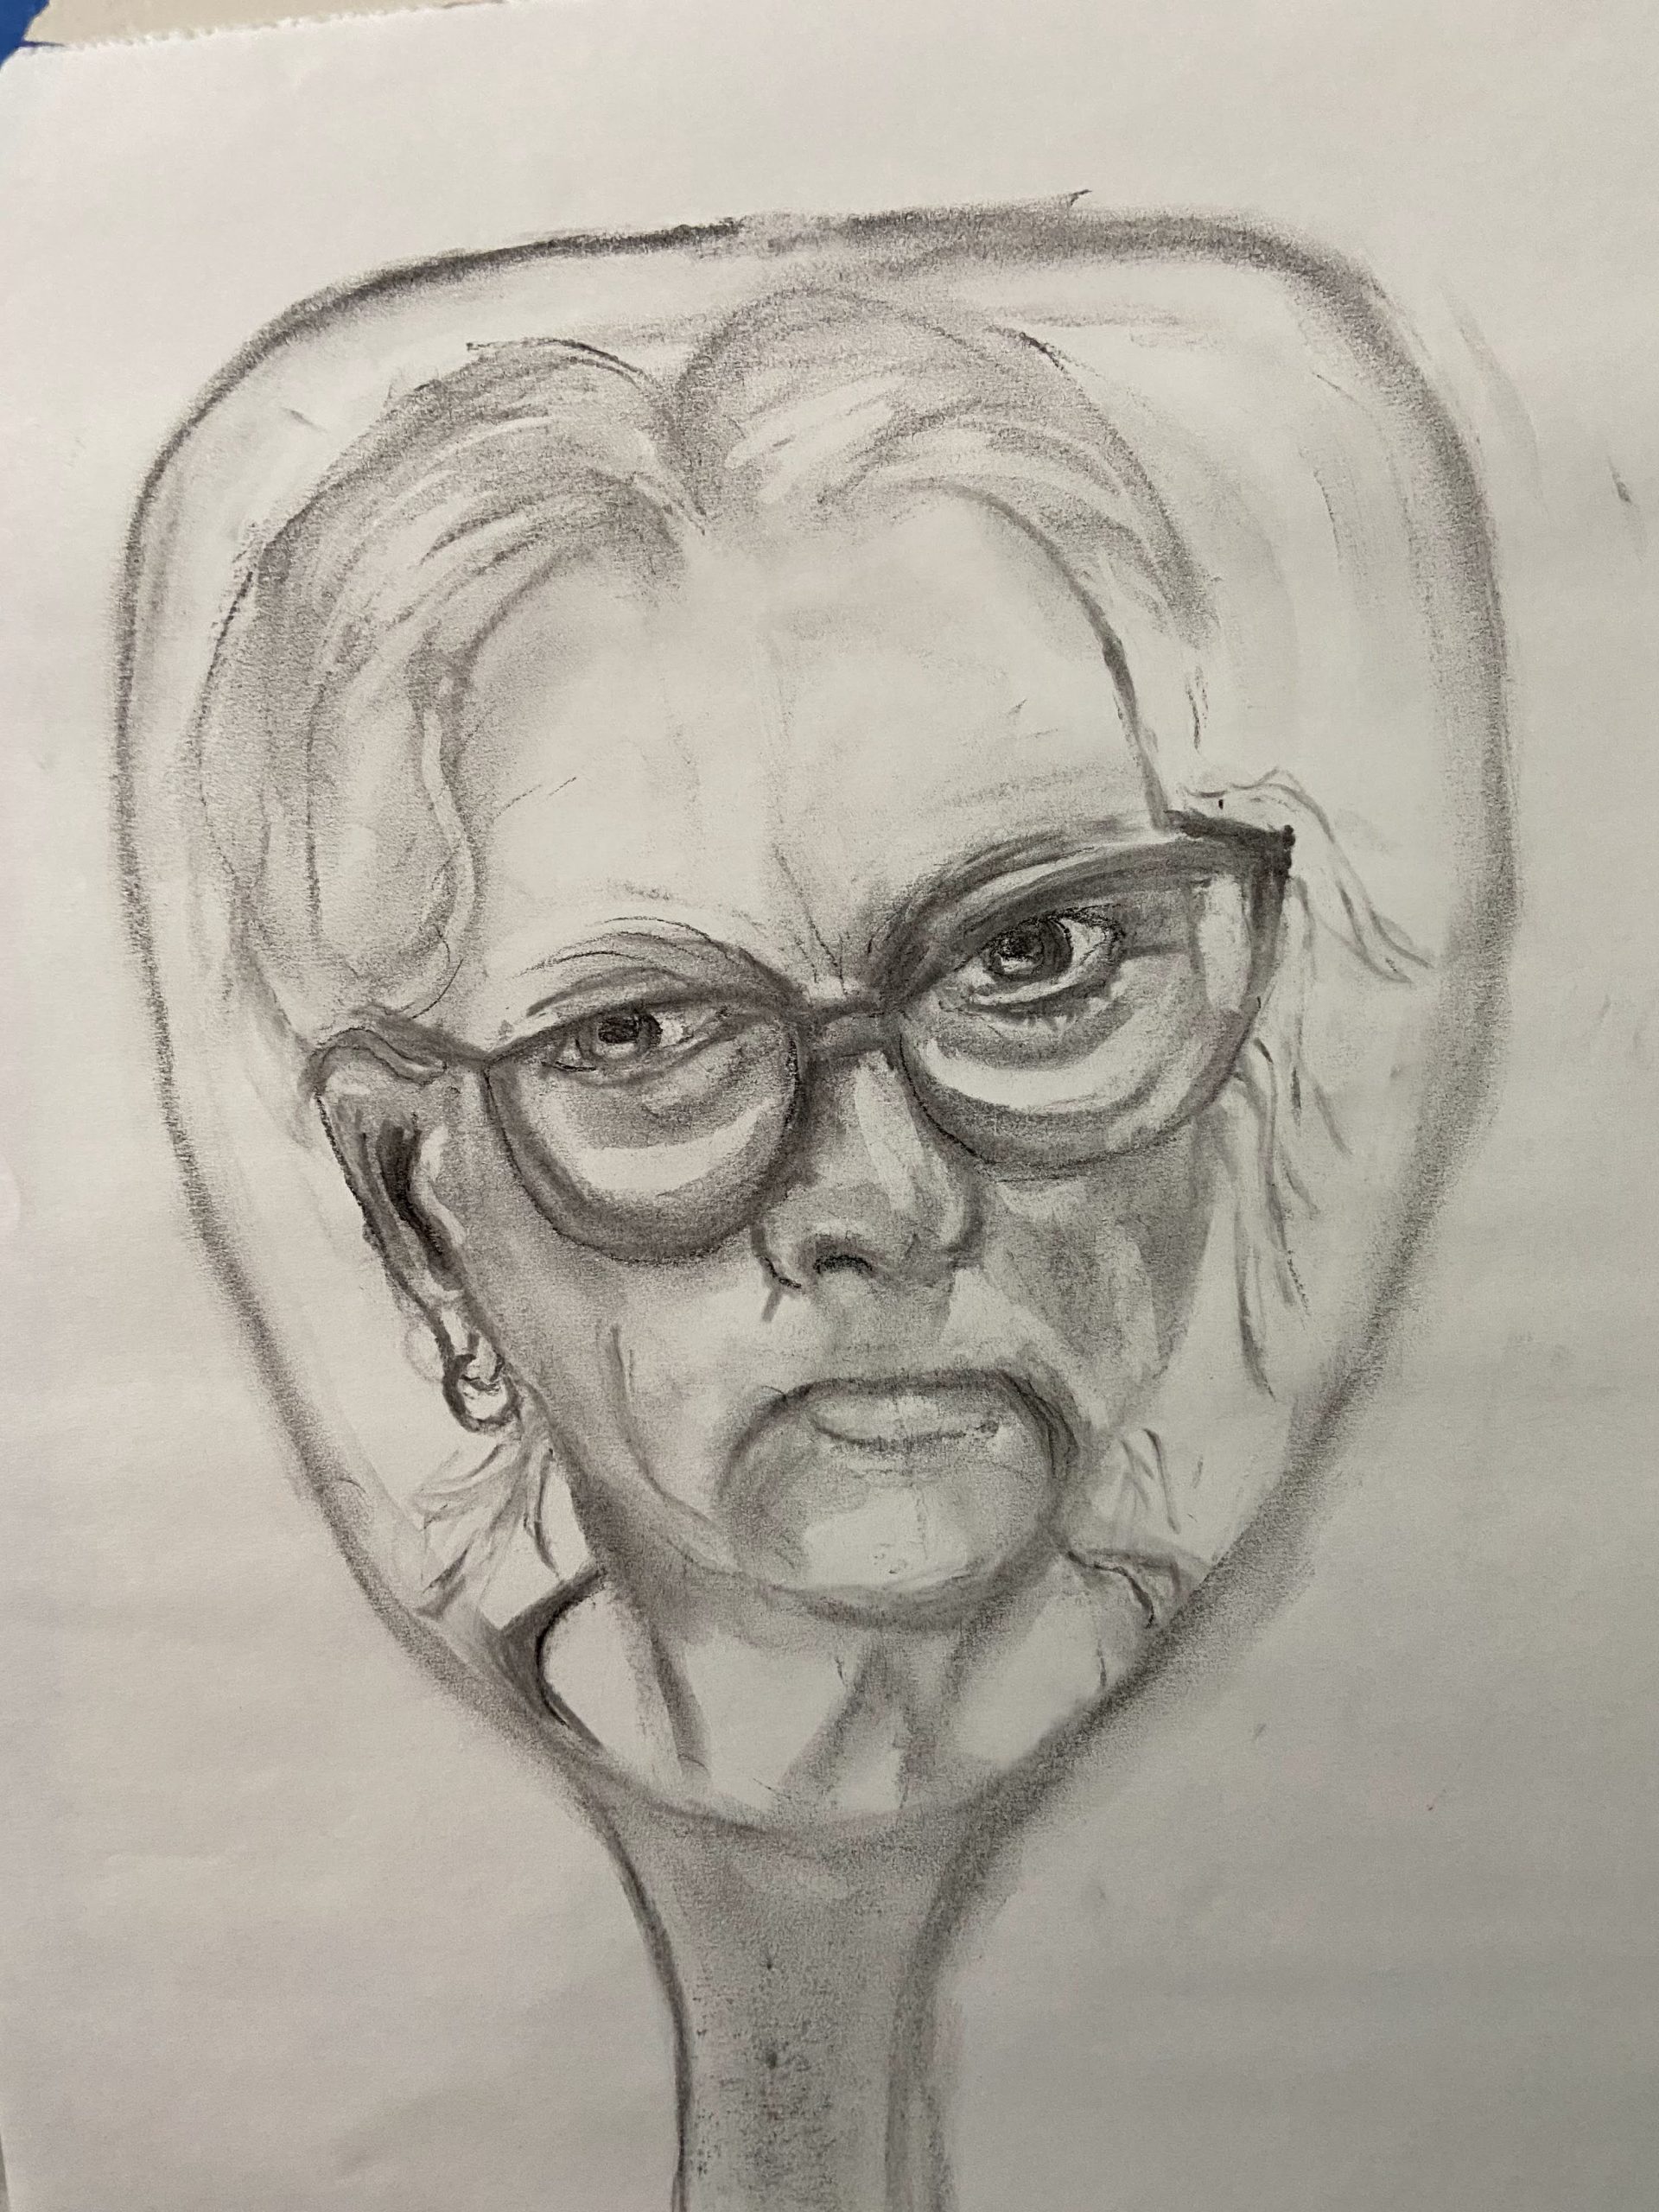
Full Self-Portrait Using a Mirror
In this lesson, we were to use a handheld mirror to do the full self-portrait. This gives the ability to draw from a 3-D model rather than a photograph which is 2-D. I had a hard time holding the mirror in the same place as I drew, so I used a bulldog clamp to secure it to my drawing board. I think I made my face too narrow, and the end result resembles Granny from the Beverly Hillbillies!
Self-Portrait in Oil
The lesson instructed us to work from a selfie portrait. I thought about going back several years and finding a selfie where I was a bit younger. In the end, I took several new selfies and had my husband help me choose which one to paint. This is the one he chose:
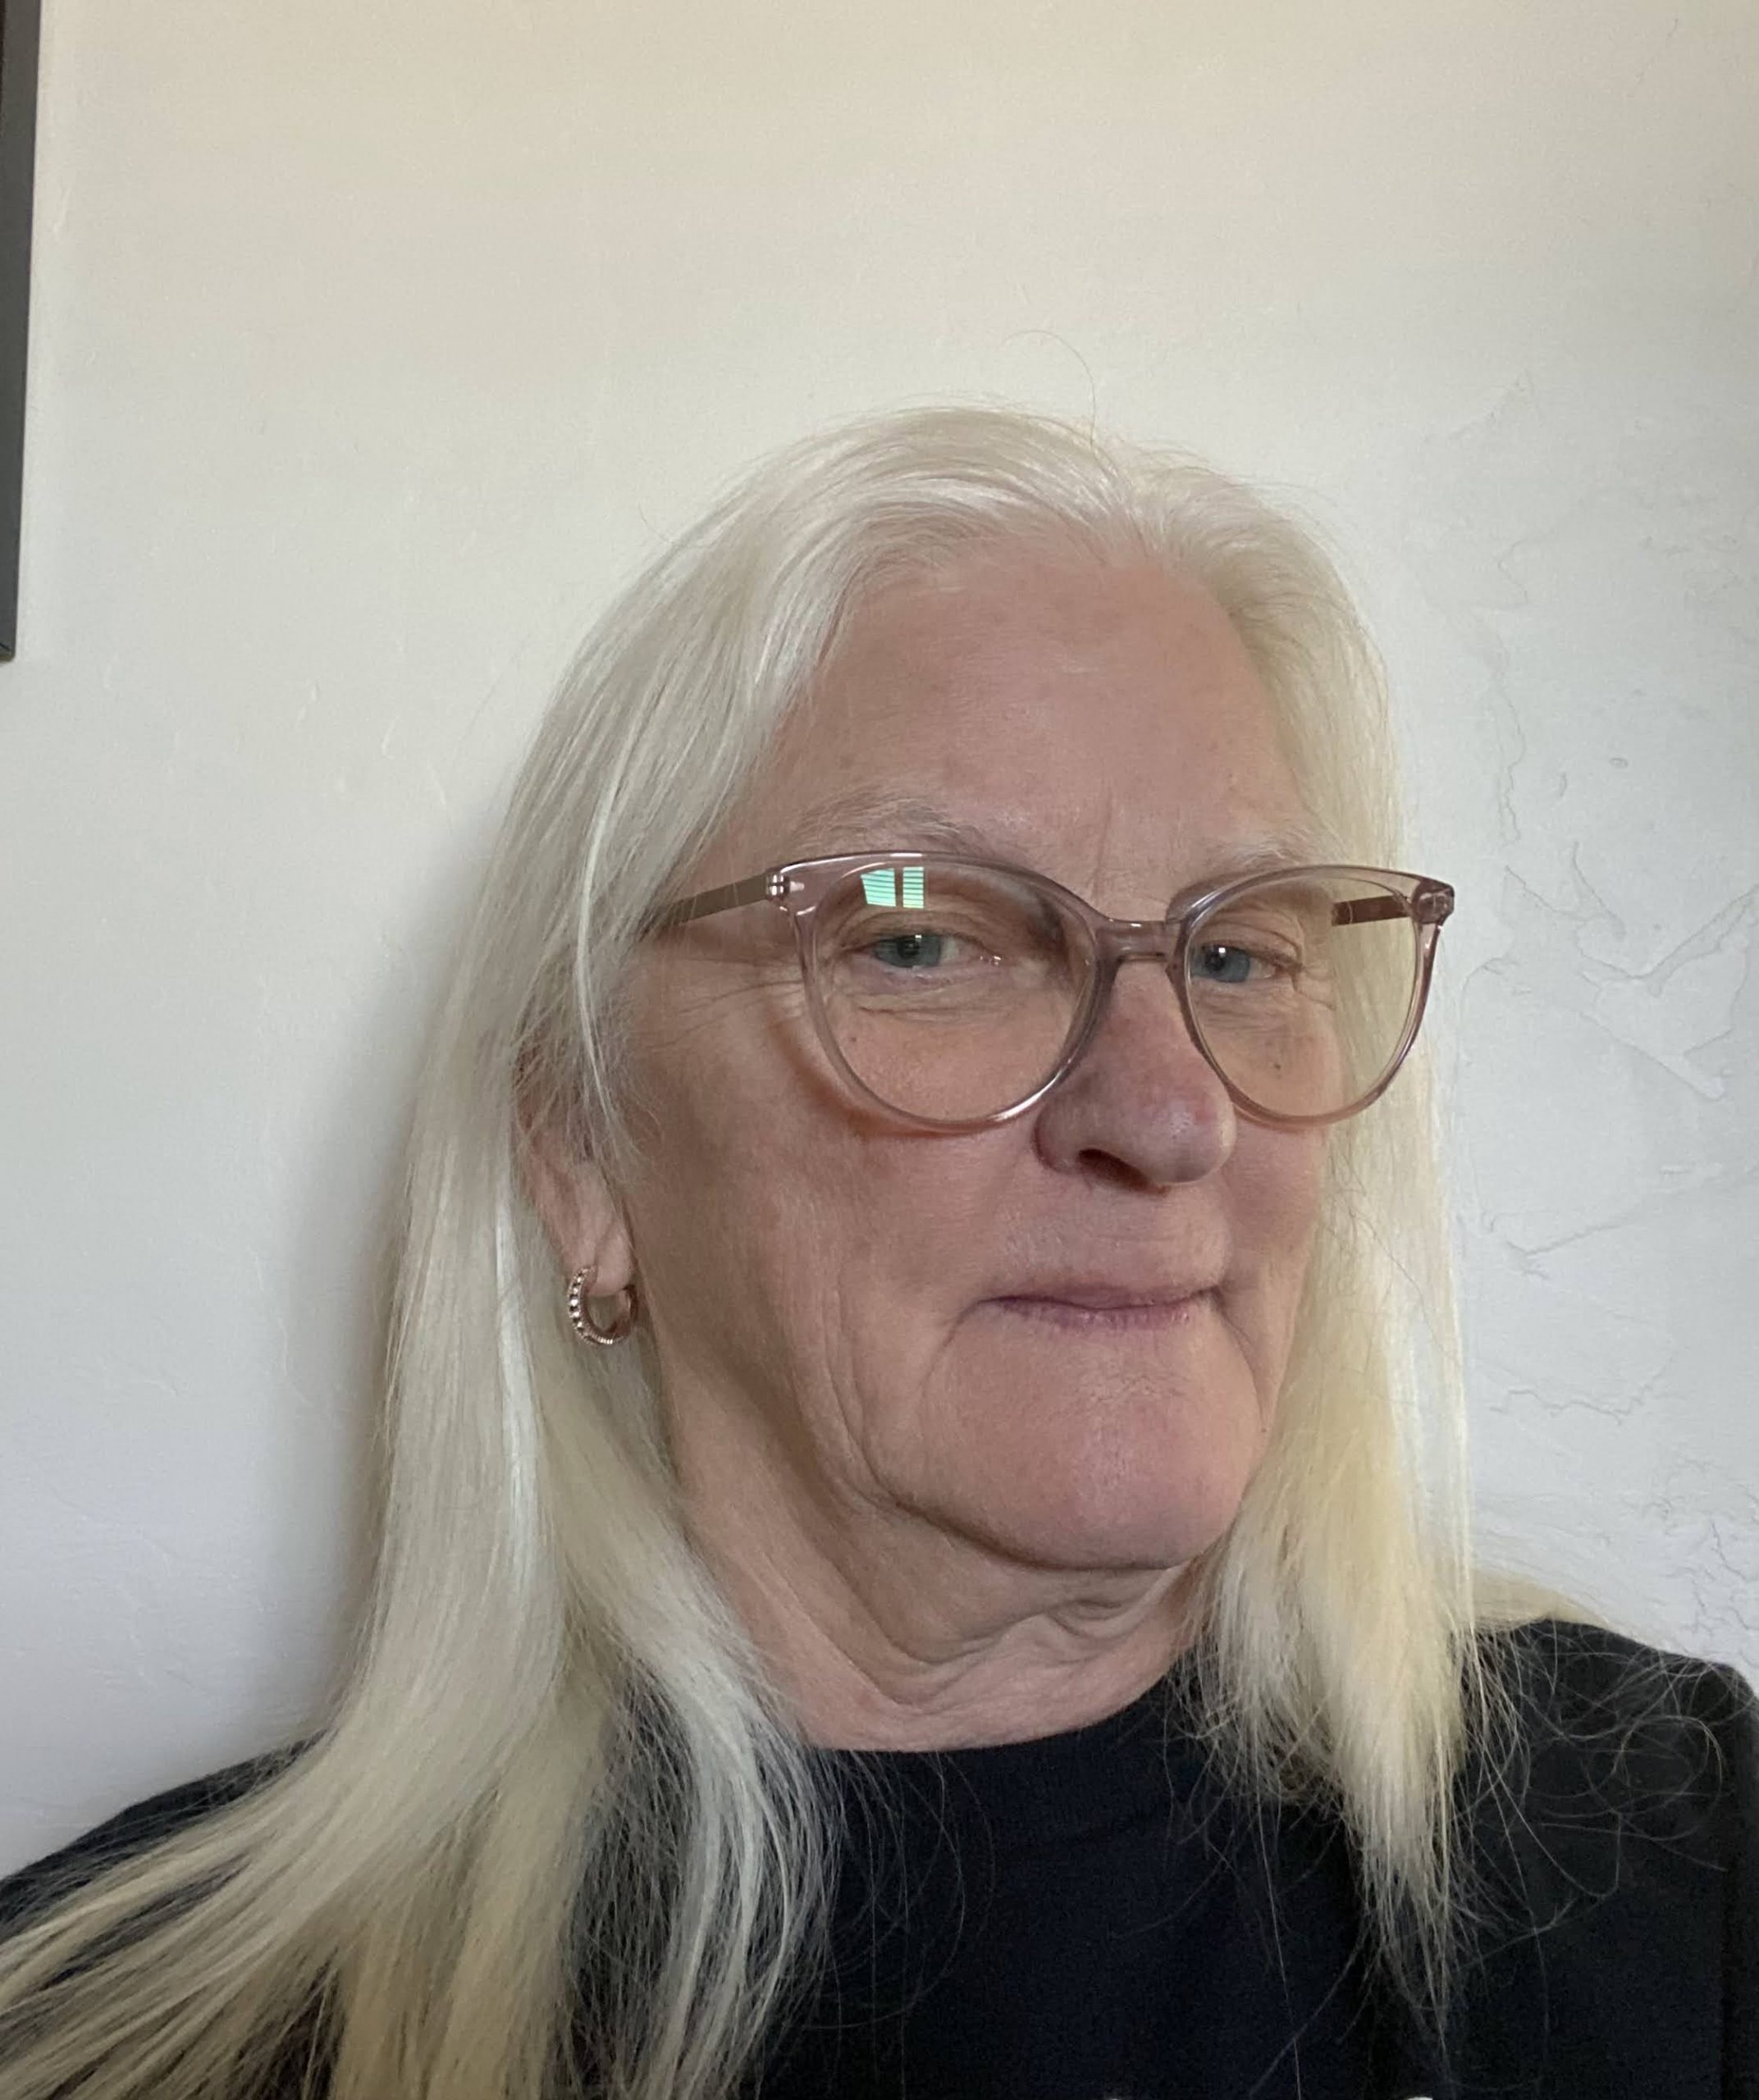
Doing a self-portrait like this is an exercise in self-reflection. I was reminded about the Nora Ephron novel, “I Feel Bad About My Neck.” I questioned and even researched what a mini facelift cost. Unfortunately, or maybe fortunately, the cost is more than I would be willing to pay. I am considering reading the Nora Ephron novel.
The first step was to draw from the selfie portrait onto the canvas. Then bright colors were applied as an underpainting. I forgot to take a picture of that step. Next was to apply a transparent glaze over the whole painting and use subtractive tools to remove areas to be highlighted.
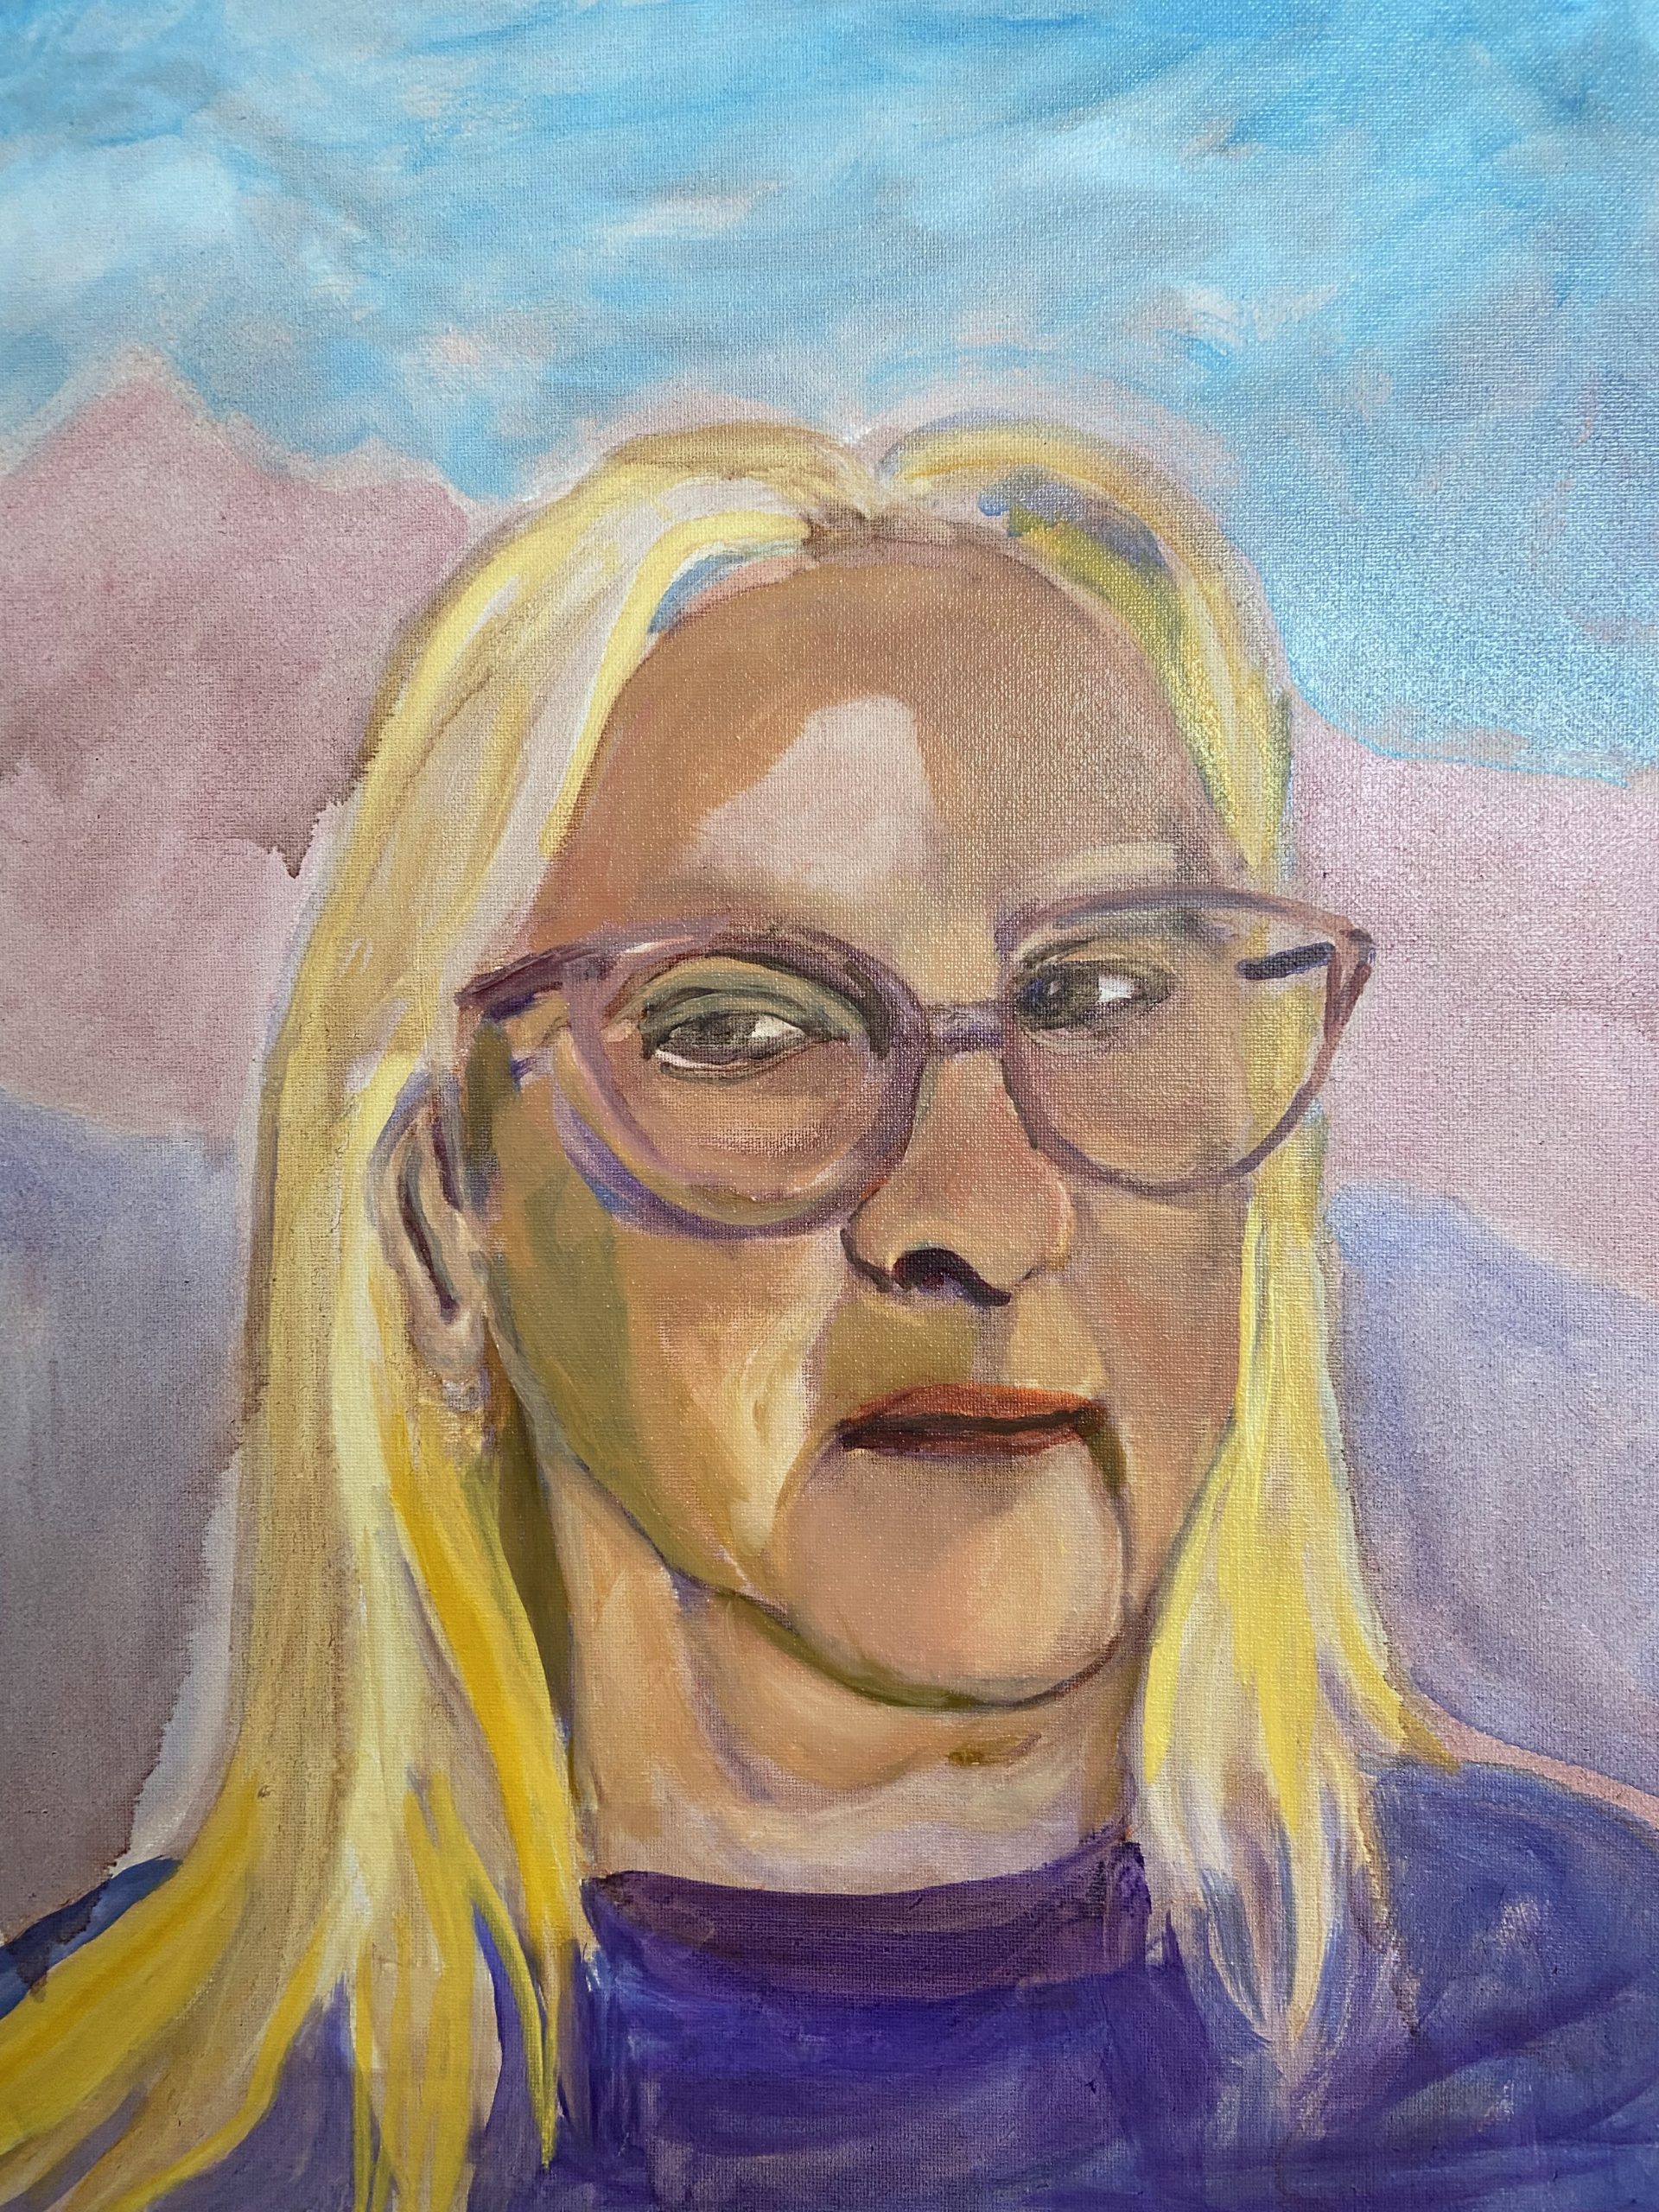
Next was to apply opaque layers of color trying to match the colors in the photograph. I had my skin tone too dark, and I struggled with what colors to use to try to recreate my hair accurately.
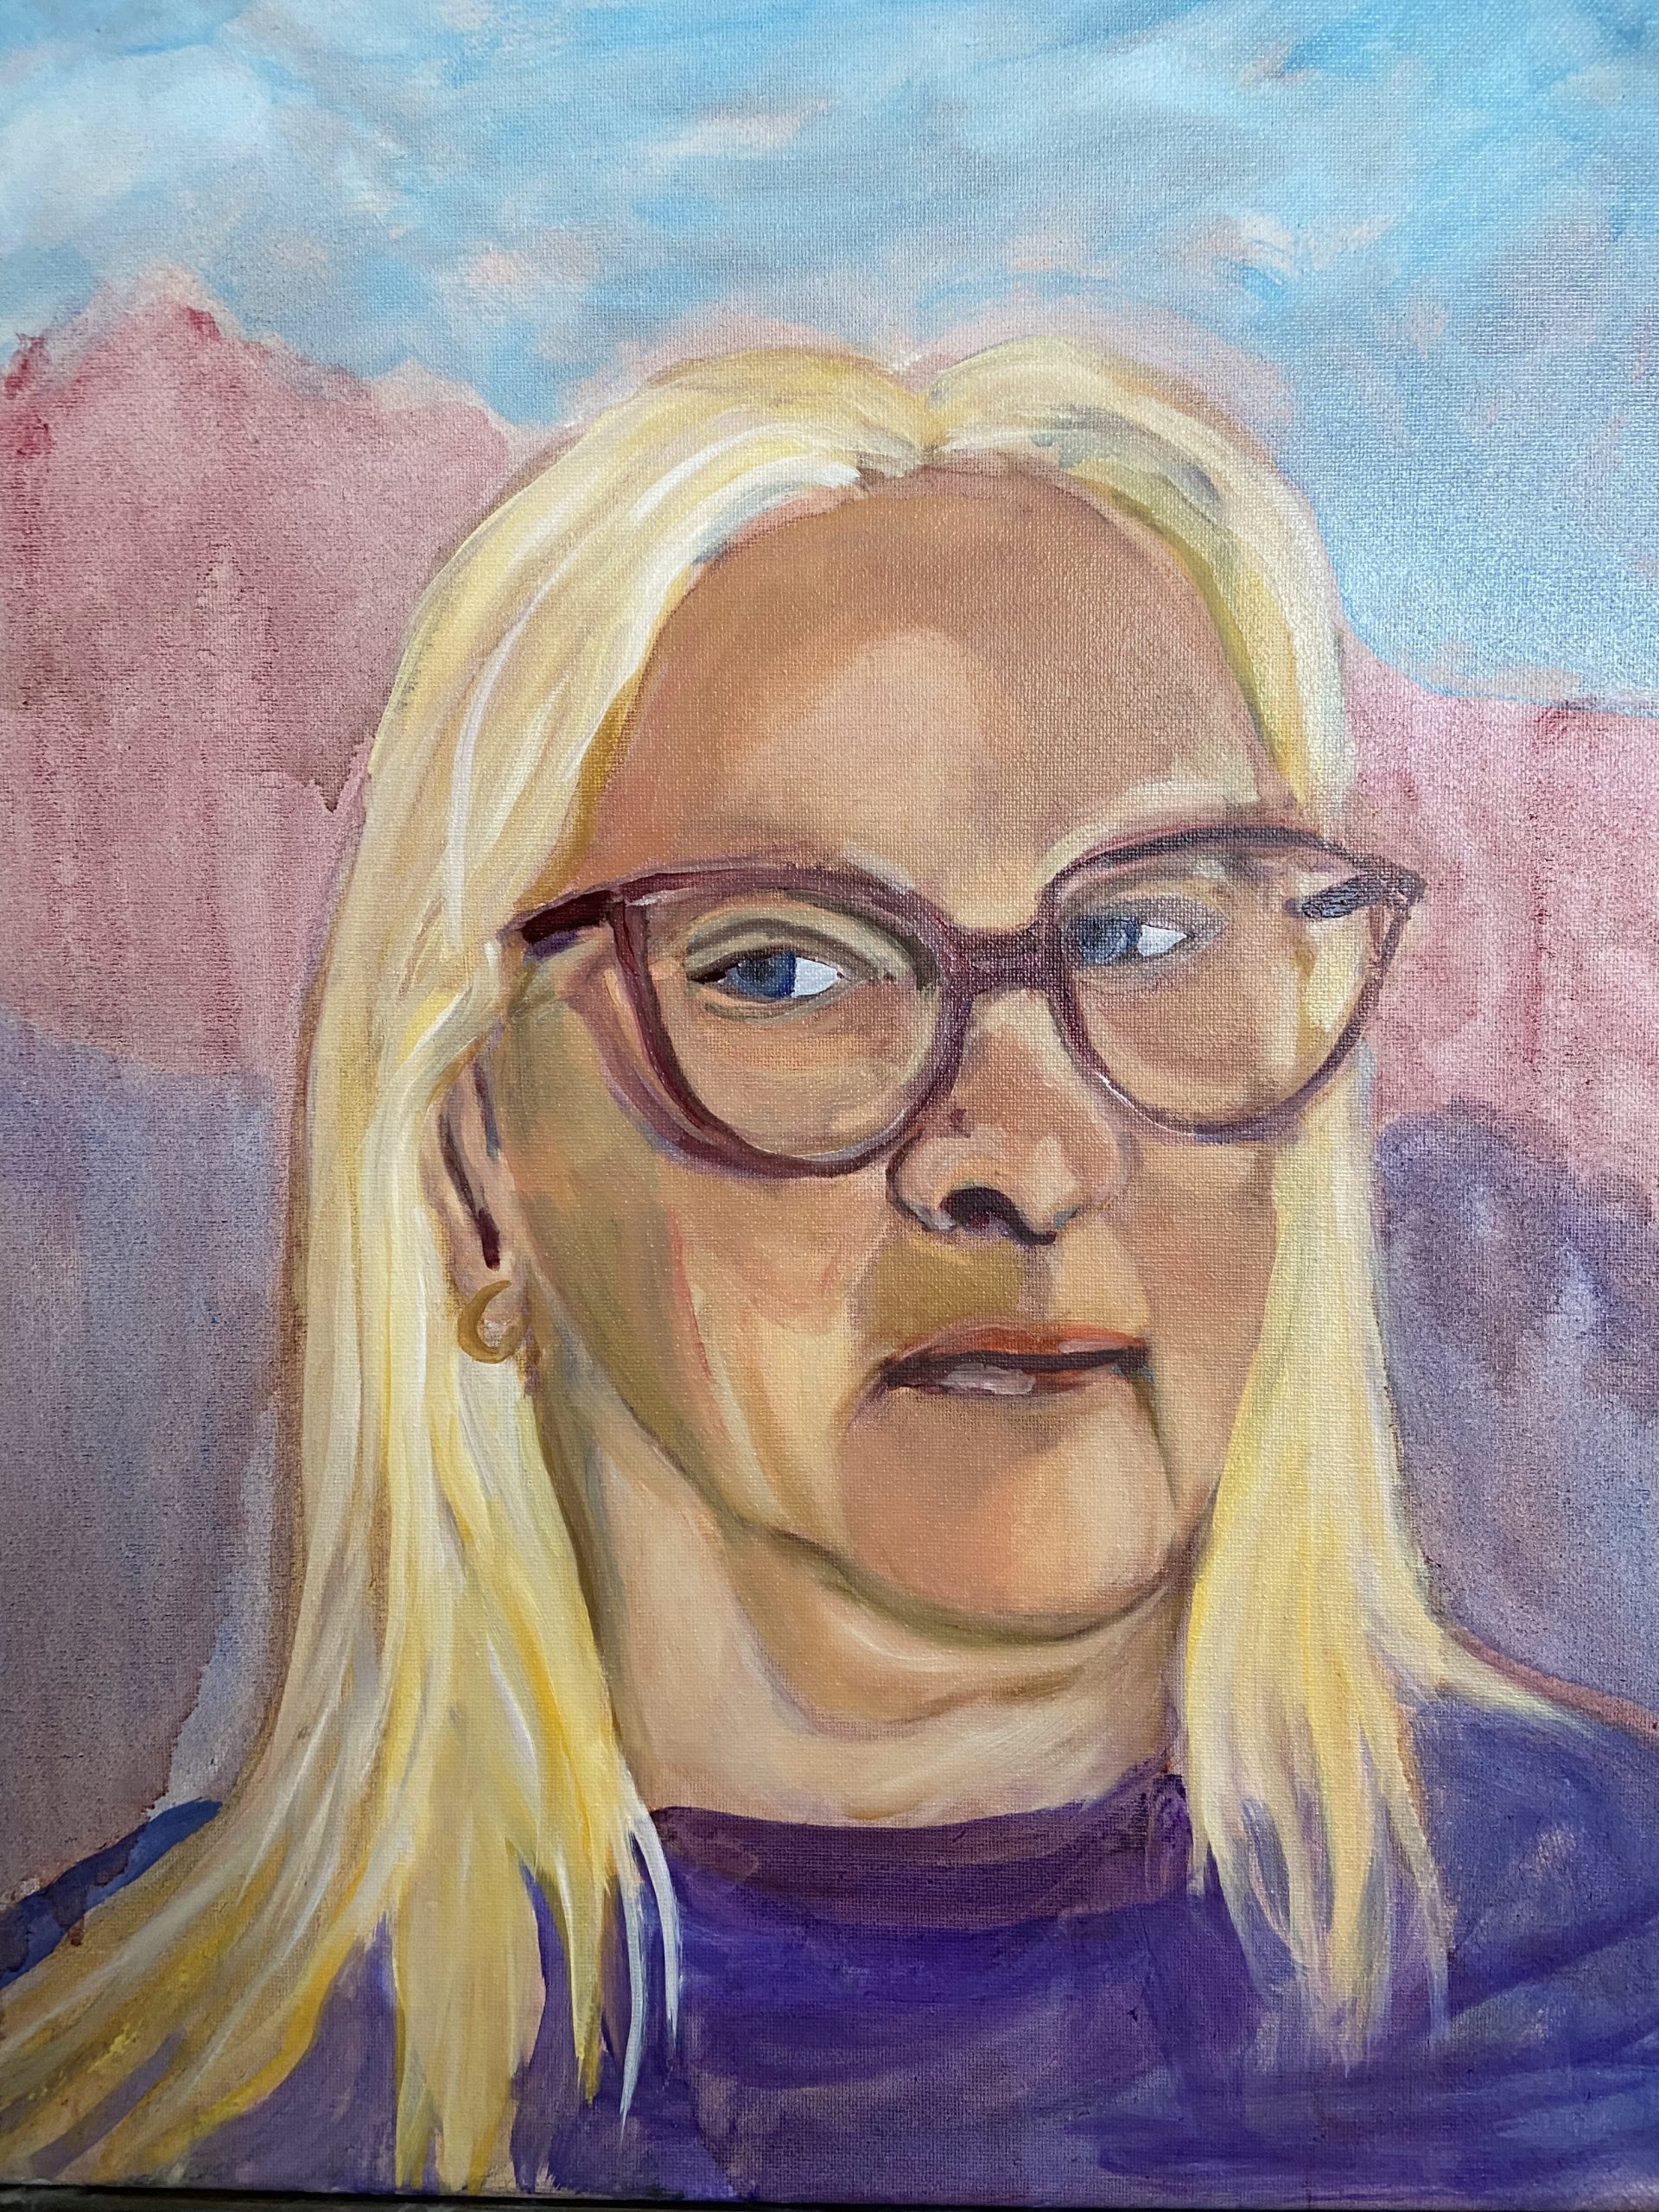
I applied more layers to the hair and skin and in the end, went over the whole face with a pinkish glaze. I’m not sure that helped much, and I don’t think I got my expression quite right. Here’s the final product:
Takeaways
I think it would have been interesting to have done a series of self-portraits every ten years or so. I’m not pleased with many of the areas of my face and neck that have aged so much, but I also know that the wrinkles and furrows tell the story of my life. I think I have kind eyes and a kind heart and maybe I’m also brave to have been willing to look at myself as I truly am.
I hope you enjoyed this post and will keep you posted on my progress through The Mastery Program and other art adentures. Thank you for being along for the ride!